Sealing your driveway is a crucial step in preserving its appearance, durability, and functionality. A well-sealed driveway can withstand the damaging effects of UV rays, oil stains, water infiltration, and harsh weather conditions. However, to achieve the best results, proper preparation is key. In this guide, we’ll walk you through the step-by-step process of how to prep your driveway for sealing to ensure a smooth and long-lasting finish.
Why Preparing Your Driveway for Sealing is Important
Before we dive into the steps, it’s essential to understand why preparing your driveway for sealing is so important. Skipping or rushing through the preparation phase can lead to a poor sealcoat that peels, cracks, or fails prematurely. Proper preparation ensures that the sealer adheres correctly to the asphalt surface, providing a protective barrier that extends the life of your driveway and enhances its appearance.
What You Need on How to Prep Your Driveway for Sealing
Before starting the sealing process, it’s crucial to consider a few key factors to ensure the success of your project:
- Weather Conditions: Check the weather forecast and choose a day with temperatures between 50 and 90 degrees Fahrenheit. Avoid sealing on rainy or extremely hot days, as this can affect the drying and curing process.
- Driveway Condition: Inspect your driveway for cracks, potholes, and oil stains. Address any repairs before applying the sealer.
- Drying Time: Allow at least 24 to 48 hours for the sealer to dry completely. Plan to keep vehicles and foot traffic off the driveway during this time.
- Sealer Type: Choose the right sealer for your asphalt driveway. Asphalt-based sealers are ideal for durability and protection against oil and gas spills.
Step 1: Cleaning the Driveway Surface
A clean surface is essential for the sealer to bond effectively with the asphalt. Here’s how to properly clean your driveway:
- Remove Debris: Use a leaf blower or push broom to remove loose debris, leaves, and dirt from the surface.
- Trim Grass Along the Edges: Trim any grass or weeds growing along the edges of the driveway to prevent them from interfering with the sealing process.
- Degrease Oil Stains: Apply a degreaser or specialized driveway cleaner to any oil stains or chemical spills. Let it sit for a few minutes, then scrub with a stiff brush to break down the contaminants.
- Pressure Wash the Driveway: Use a pressure washer to thoroughly clean the surface, removing dirt, grime, and remaining contaminants. Make sure to use a soap nozzle and a mild detergent for a deep clean.
- Rinse and Let Dry: Rinse the entire driveway with clean water and let it dry completely. It’s crucial that the surface is completely dry before applying the sealer to prevent the sealer from sticking improperly.
Step 2: Repairing Cracks and Potholes
Addressing any existing damage to your driveway is essential for achieving a smooth, even seal. Here’s what to do:
- Fill Cracks: For cracks wider than ¼-inch, use a crack filler to seal them. Apply the filler using a caulking gun or pour it directly into the cracks, then smooth it out with a putty knife.
- Repair Potholes: Use an asphalt patch to fill any potholes or depressions. Follow the manufacturer’s instructions to ensure proper application and curing.
- Allow to Cure: Let the crack filler and patch material cure as recommended by the manufacturer, usually for 24 to 48 hours, before proceeding with the sealing process.
Step 3: Protect Adjacent Areas
Protecting surrounding surfaces from accidental sealer spills or splatters is a crucial step. Here’s how to safeguard the area:
- Tape and Cover: Use painter’s tape and plastic sheeting to cover adjacent surfaces like walkways, curbs, and garage doors.
- Mark Off the Driveway: Use caution tape or cones to block off the driveway and prevent accidental foot or vehicle traffic during the sealing process.
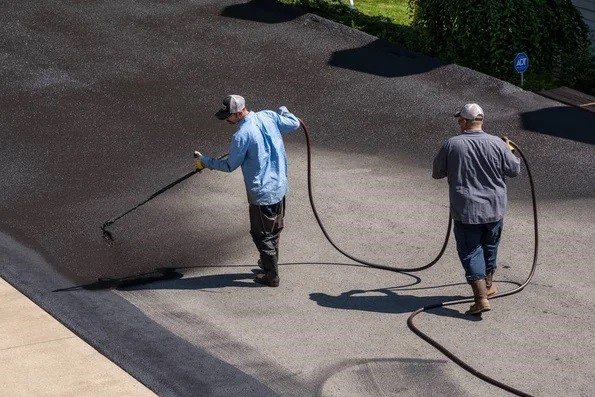
Step 4: Applying the Sealer
With the driveway cleaned and repaired, it’s time to apply the sealer. Follow these steps for the best results:
- Mix the Sealer: Open the pail of driveway sealer and mix it thoroughly with a mixing paddle attached to a drill. This ensures the sealer has a consistent texture.
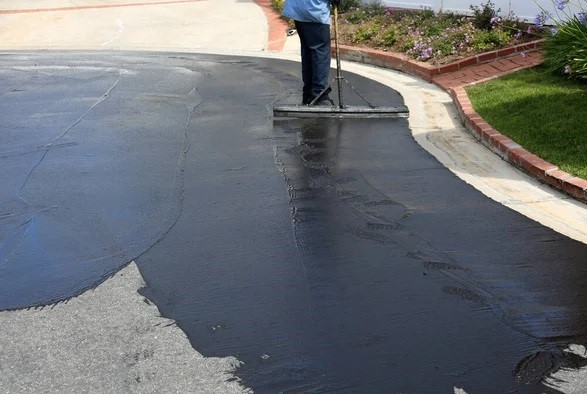
- Pour the Sealer: Starting at the highest point of the driveway, pour a line of sealer across the width of the driveway.
- Spread the Sealer: Use a squeegee or brush applicator to spread the sealer evenly across the surface. Work in small sections, moving from side to side in a back-and-forth motion.
- Apply Thin Coats: Avoid applying a thick coat of sealer. Instead, apply two thin coats, allowing the first coat to dry before applying the second. This helps the sealer adhere better and prevents cracking or peeling.
- Edge the Driveway: Use a small brush to apply the sealer along the edges of the driveway, ensuring complete coverage.
Step 5: Allow Proper Drying Time
Allowing the sealer to dry and cure properly is crucial for a long-lasting finish. Here’s how to ensure optimal drying:
- Check the Weather: Make sure no rain is in the forecast for at least 48 hours after sealing.
- Drying Time: Allow the sealer to dry for at least 24 to 48 hours, depending on the weather conditions and the manufacturer’s instructions.
- Keep Off the Driveway: Prevent any vehicle or foot traffic on the driveway during this time to avoid damaging the wet sealer.
Step 6: Maintaining Your Sealed Driveway
Proper maintenance can extend the life of your sealed driveway. Follow these tips to keep it looking its best:
- Regular Cleaning: Sweep the surface regularly to remove dirt and debris. Use a mild detergent and water to clean the surface every few months.
- Promptly Address Stains: Clean up any oil or chemical spills as soon as they occur to prevent staining and damage to the sealer.
- Reseal as Needed: Depending on the wear and tear, reseal your driveway every two to three years to maintain its protective layer.
Get Professional Driveway Sealing Services
Proper preparation is key to a successful driveway sealing project. If you’re looking for professional sealing services to protect and enhance the life of your driveway, contact Sidewalk Safety Inc. today! Our experienced team is here to provide top-notch sealing and repair services to keep your driveway looking great and functioning perfectly.
Call us now at (916) 719-6910 to schedule your consultation and get a free quote!
Final Thoughts
Prepping your driveway for sealing may seem like a daunting task, but with the right steps, tools, and techniques, you can achieve professional results. By following this step-by-step guide, you’ll ensure that your driveway sealer adheres properly, providing long-lasting protection against the elements. Whether you choose to tackle this project yourself or hire professionals, proper preparation is the key to a successful driveway sealing job.
And remember, while enhancing your property with driveway sealing, consider other energy-efficient improvements like installing solar panels for home. Solar panels can significantly reduce your energy costs, increase your property value, and complement your efforts to maintain a well-kept driveway, making your home more sustainable and attractive.
For all your driveway sealing needs and more, trust the experts at Sidewalk Safety Inc.! Call us today to ensure the safety and beauty of your property!